#
Applio
Last update: Apr 01, 2024

#
#
Introduction
Applio is a VITS-based Voice Conversion Tool developed by the IA Hispano team.
It's liked for its great UI & lots of extra features, such as TTS (with RVC models too), plugins, automatic model upload, customizable theme & more.
Because of its user-friendly experience & active development, it's considered to be one of the best forks.
It also has a cloud version, in case you don't meet the requirements to run it locally.
#
Pros & Cons
The pros & cons are subjective to your necessities.
- Very complete
- Has an active development
- Currently stable
- Very fast
- TTS features
- Automatic model upload
- Has Mangio-Crepe
- User-friendly UI
- TensorBoard included
- Extra features: (plugins, model fusion, etc)
- Issues when downloading to external drives
#
#
Download
#
Before Downloading:
- Make sure that you place Applio inside a folder on C drive.
- Don't put it in a folder with privileged access.
- Don't run the run-install.bat as an administrator.
- Make sure the path does not contain any spaces or special characters.
- Deactivate your antivirus and firewall to avoid missing dependencies.
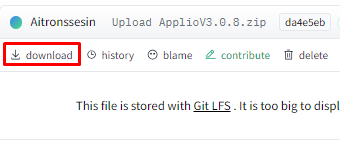
The easiest way to download Applio is by going to Applio's Hugging Face repo, and clicking the [ download ] button on the right-hand side.
- Unzip the folder. It may take a few minutes.
Open Applio's folder & execute
run-applio.bat.
- A console tab will appear, and after a moment your default browser, with Applio ready to use.
Don't close the console until you're done using it, or it will stop working.
#
#
#
Inference
If you encounter an issue, be sure to read the Troubleshooting chapter.
#
#
#
1. Upload voice model.
Go to the Download tab.
You have two ways of uploading it: through its link or manually inputting its files.Link - Go to the Download tab & paste the link of the model in the
Model Linkbar. It must be from Hugging Face or Google Drive.
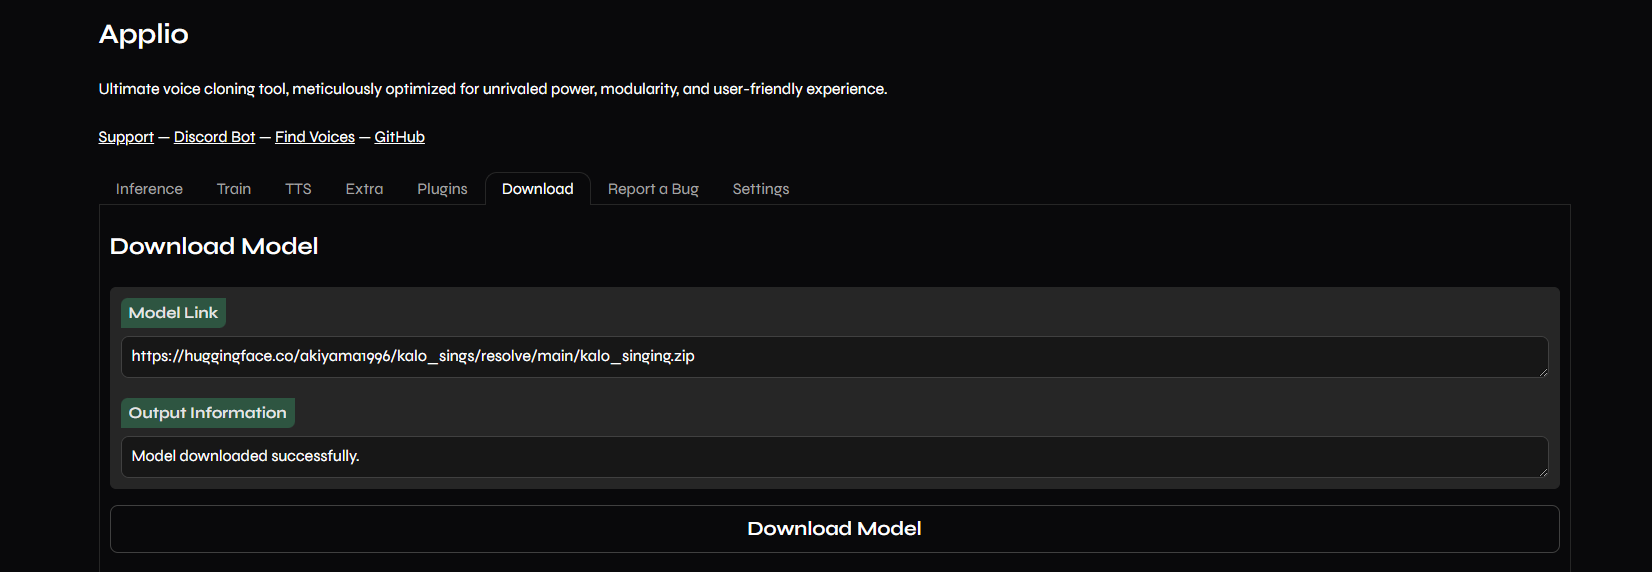
- Press
Download Model.
Manually - Drag & drop the model's .PTH in the Drop files box below.

- Then drag the .INDEX.
- Go to the Download tab & paste the link of the model in the
#
2. Select voice model.
Return to the Inference tab & click the
Refreshbutton on the right.
Select your model in the
Voice Modeldropdown.
#
#
3. Input vocals.
With Applio you can convert audios individually or in batches:
Single file - Drag & drop the audio or click the upload box to search it.

- Then select it in the dropdown below.

In batches Go to the Batch tab.
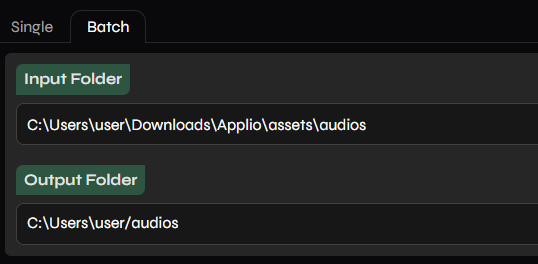
In the
Input Folderbar, paste the path folder containing the audios.In
Output Folderyou can paste a path folder for the results.Ensure the paths don't contain spaces/special characters.
- Drag & drop the audio or click the upload box to search it.
#
4. Modify settings. (optional)
Unfold
Advanced Settingsif you wish to modify the inference settings for better results, or to determine the output folder.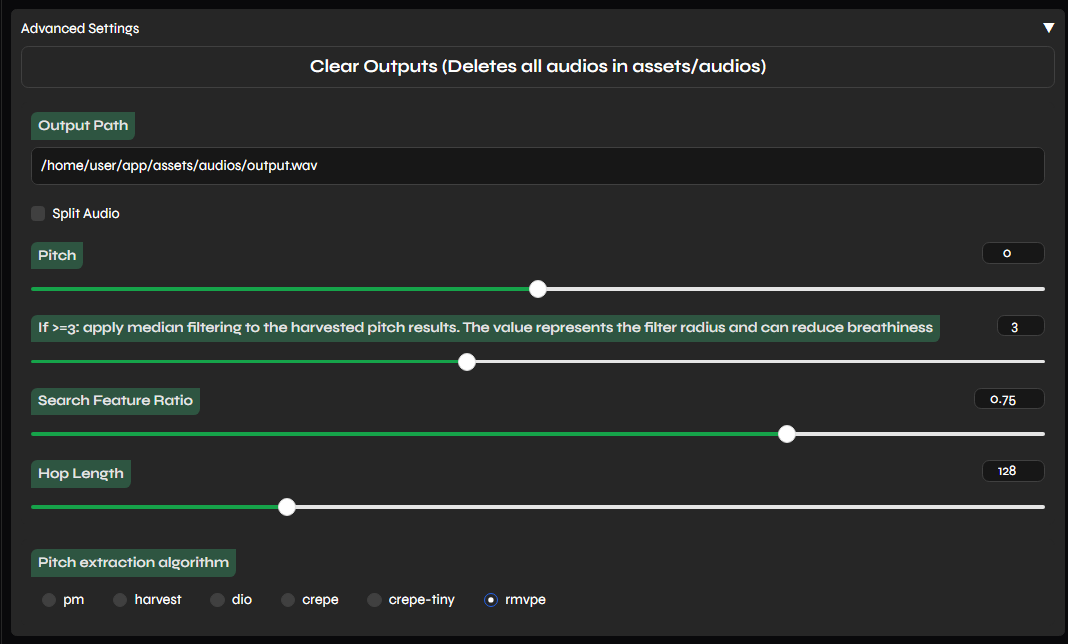
#
#
5. Convert.
Click
Convertat the bottom. The audio will begin to process.
The processing time will mainly depend on your specs, length of audio & the algorithm picked.Once it's done, you can hear the results in the Export Audio box below.
By default the output files will be in the "audios" folder:
\ApplioV3.0.7\assets\audios
#
#
#
Training
#
The training guide will be centered around using TensorBoard. Read about it first if you haven't already.
If you encounter an issue, be sure to read the Troubleshooting chapter.
#
#
#
a. Model Name
#
Go to the
Traintab. Input a name for your model inModel Name.
Don't include spaces/special characters.
#
#
b. Dataset Path
#
Paste the path file of your dataset in the Dataset Path bar. Ensure the path doesn't contain spaces/special characters.

#
#
c. Sampling Rate
#
Select your dataset's sample rate. If you don't know the amount, click here.

#
#
d. Preprocess Dataset
#
Ensure RVC Version is set as
V2& clickPreprocess Dataset.It'll finish when the output box says
preprocessed successfully.
#
#
a. Pitch extraction algorithm
#
Select the algorithm you want. Use either
CrepeorRMVPE, as the rest are outdated.
#
#
b. Hop Length (optional)
#
If you chose
Crepe, you can modify its hop length.
#
#
c. Extract Features
#
Press Extract Features.
It'll finish when it saysextracted successfully.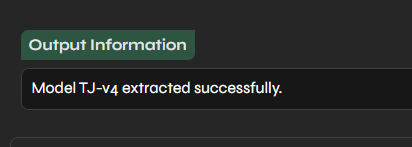
#
#
a. Batch Size
#
If you are a newbie, use
8. But in case your dataset is short (around 2 minutes or less), use4.
#
#
b. Save Every Epoch
#
Frequency of the saving checkpoints, based on the epochs.
If you are a newbie, simply leave it at
15.
E.g: with a value of
10, they will be saved after the epoch 10, 20, 30, etc.
#
#
c. Total Epoch
#
Input the total amount of epochs (training cycles) for the model.
But since we'll use TensorBoard, use an arbitrarily large value like
1000
#
#
d. GPU Settings
#
If you have multiple GPUs, tick
GPU Settingsto use a specific one for the training.
#
#
e. Generate Index
#
- Click
Generate Index. This will create the model's .INDEX file.
#
#
f. Start Training
#
Press
Start Trainingto begin the training process.
To open TB, execute
run-tensorboardin Applio's folder. Remember to monitor it, as well as the console just in case.
The latter will show you errors if they happen, and information about the epochs & checkpoints.

#
#
a. Stop training
#
When you're very sure of overtraining, you can stop training by going to the
Settingstab & pressRestart Applio.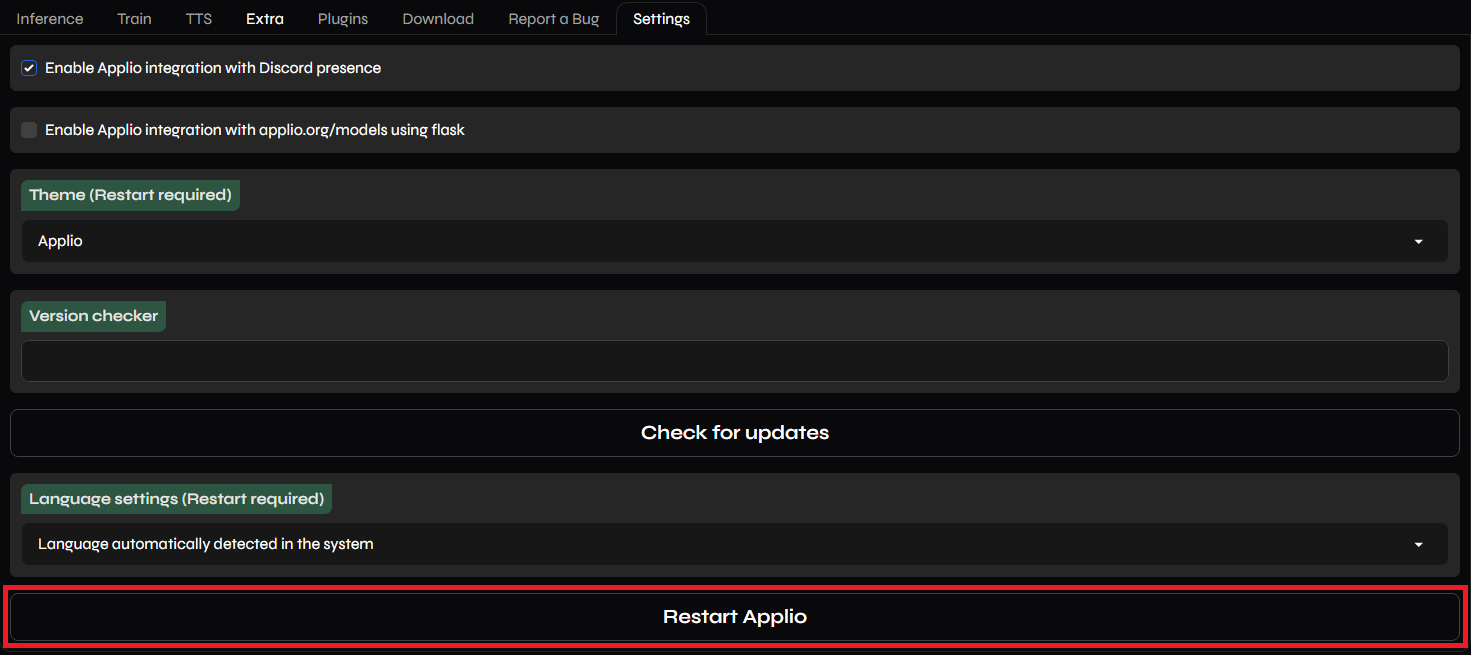
#
#
b. Get the INDEX
#
- Create a new folder anywhere named as the model.
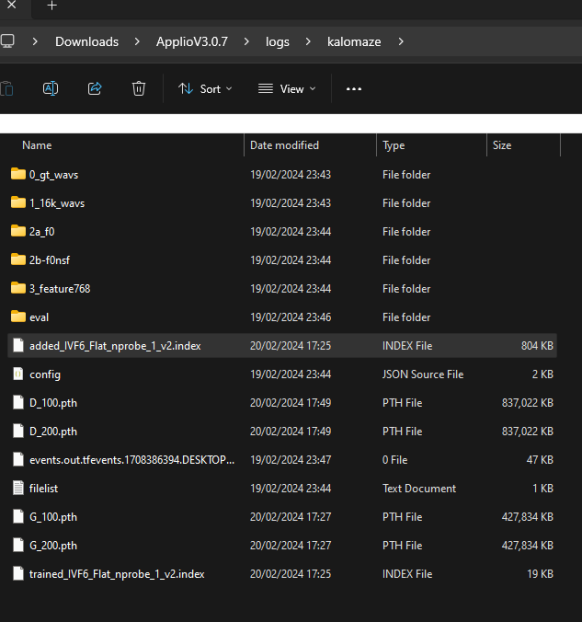
- Open Applio's folder, go to
logs, and open the folder named as the model.
- Select the .INDEX named
added_& move it to your newly made folder.
#
#
c. Get the PTH
#
In said folder you'll also find all the checkpoints.
Select the one closest to before the overtraining point, and move it to the new folder.
The checkpoints will be organized with this format: ModelName_Epoch_Step.pth
Example:arianagrande_e60_s120.pth
- And that's all, have fun with your model. To test it, do a normal inference as usual.
- In case the training finished but the model still needed training, you don't have to start from scratch.
- Simply enter the same settings & criteria that you've previously inserted. You don't have to do the preprocess or train the .INDEX again.
- You can change the save frequency, or increase the Total Epoch amount in case you didn't input enough before.
- Begin training again & remember to monitor TB & console like before.
#
#
#
#
TTS
+ with any RVC model
#
Applio is also known for having one TTS tool by default, with plenty of voices to choose for.
You can also use it with RVC models & apply the inference settings if you wish.
Aditionally, you can download the Eleven Labs TTS plugin.
#
#
Instructions:
Go to the TTS tab.

#
If you want to use an RVC model, download it, go to TTS, click
Refresh& select it in Voice Model & Index File.
- To modify the inference settings or the output folder for the TTS/RVC audio, unfold
Advanced Settings.
#
In TTS Voices select the voice of your desired language, accent & gender.
In Text to Synthesize input your text. Then click
Convert.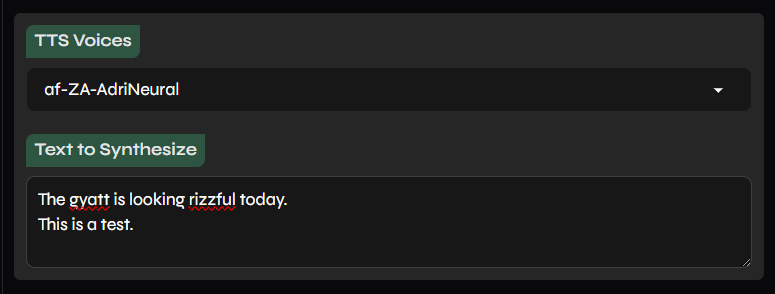
- If you are using an RVC model, select a voice that matches the model the most, to guarantee great results.
#
Once it's done, you'll be able to hear the result in the Export Audio box. By default, the output audio will be in the "audios" folder. <
\ApplioV3.0.7\assets\audios>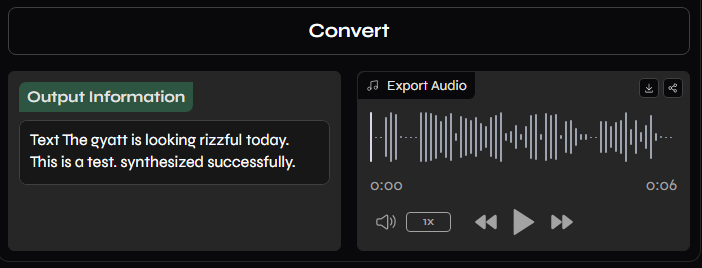
#
#
#
Extra
#
Applio has an Extra menu, containing an audio analyzer, originally made by Ilaria.
Making it convenient for determining the sample rate of datasets when training models.
It also contains the model fusion tool, ideal for advanced users.
#
#
Audio Analyzer:
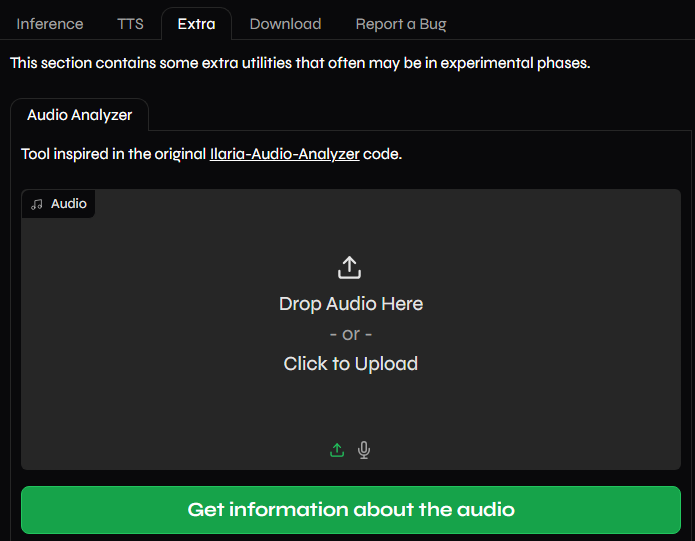
Go to the Extra tab & press the upload box to input your audio. Or simply drag & drop.
#
- Once it's done uploading, click
Get information about the audio.
#
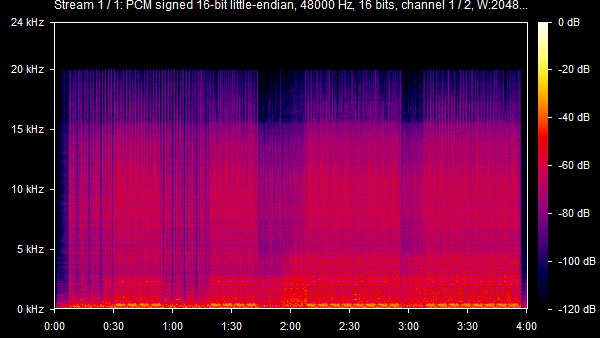
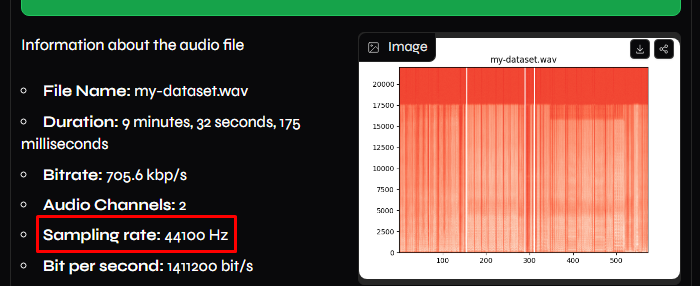
In Sampling rate you'll see the audio's full sample rate. Use said value for training.
#
WARNING:
If the frequencies don't reach the top of the spectrogram, see at which number peaks & multiply it by 2.
#
Here it reached 20 kHz. Doubling it gives 40kHz. Therefore the ideal target sample rate would be
40k
#
#
#
Plugins
Plugins are components that you can add to Applio, that add new features & enhance your experience.
These are made by the public, and are free & easy to install.
You can find them on their GitHub page. More will be added in the future.
#
#
Installation:
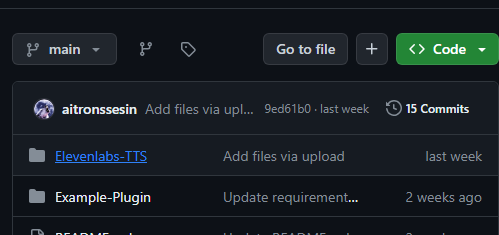
Access their GitHub page & click on the name of the plugin you want.
#
Click on the ZIP file.
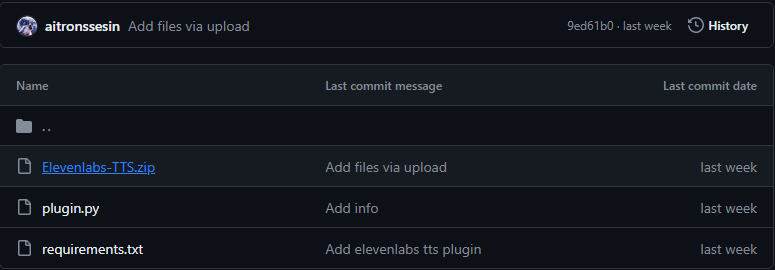
Click on the download button on the right. This will download the ZIP file of the plugin.

#
Open Applio & head over to the Plugins tab. Drag & drop the ZIP file to the upload box.

You will be able to see its installation process in the console.

#
Go to the settings tab & click Restart Applio at the bottom. Then you'll be able to see the plugin in the Plugins tab.

#
#
#
Troubleshooting
#
#
- If it's lower than 32k: select
32k.
- If it's 44.1k: select
40k.
- If i'ts higher than 48k: select
48k.
#
- This a phenomenon called artifacting. To fix it, read here.
#
- Report your issue here.

