
#
Vocal Isolation
Last update: Feb 29, 2024
#
#
Introduction
A vocal isolation app is a software designed to extract a person's vocals from an audio file, usually through the use of AI models.
They can remove undesired noises, like background noise, reverb, echo, music, etc.
The goal is to get an audio sample with clean vocals, which is what RVC needs to give the most accurate & quality results.
For RVC users, the best app is Ultimate Vocal Remover 5 (or UVR). It can be used either locally or through the cloud.

#
#
Local UVR
You'll require great specs & GPU to run it effectively. Otherwise, use the cloud version.
-
-
#
Installation
Go to their official website & press
Download UVR.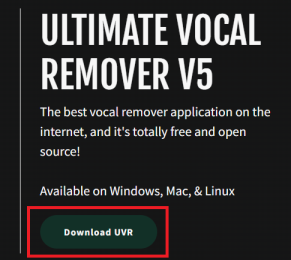
#
- It will redirect you their GitHub page. Click the download link for your operating system.
UVR is available both on Windows & Mac.
#
Once the installer finishes downloading, execute it & follow the instructions.
Make sure to tick🗹 Create a desktop shortcutfor an easier access to UVR.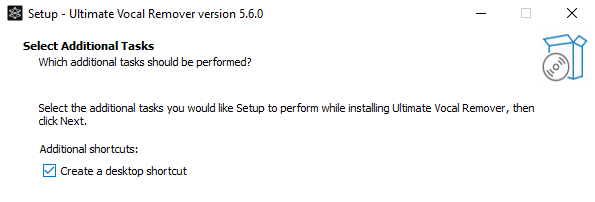
#
#
#
How to Use
#
#
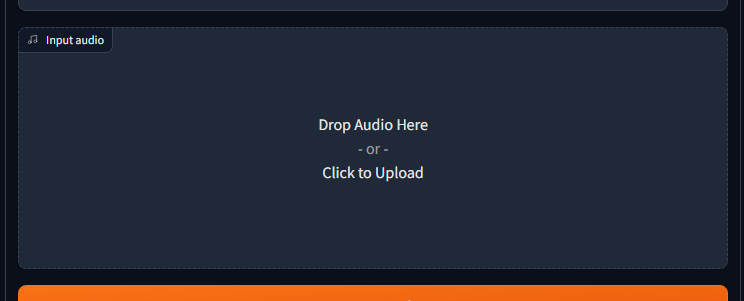
1. Input audio.
#
Click
Select inputto select your audio/s. Or just drag the files to it.
In
Select outputyou can define the folder for the results.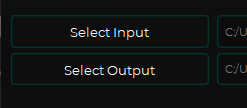
For better results, have the audio in a lossless format (WAV or FLAC), & not MP3.
#
2. Select FLAC & GPU Conversion.
#
At the right you can select the output format.
We recommend pickingFLAC. Learn why here.
If your GPU is compatible with CUDA, toggle
GPU Conversionon for a faster process.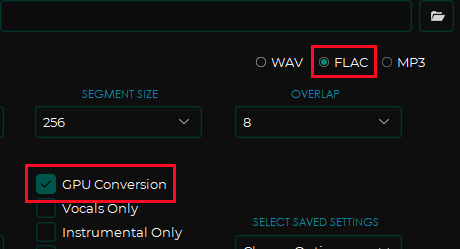
#
This step is not mandatory, but recommended for better results.
#
3. Extract vocals.
#
In CHOOSE PROCESS METHOD select
MDX-Net, and select theMDX23Cmodel.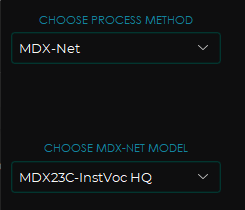
#
#
- Now click the long
Start Processingbutton.
#
TIP: To test models/options more efficiently, tick Sample Mode to only process 30 seconds of your sample.
#
4. Clean vocals.
#
Usually songs include reverb & backing vocals. These negatively impact the results in RVC.
So if the output has any undesired noises, follow the procedure on Cleaning Vocals.
#
#
1. Input audio.
#
Click
Select inputto input the vocals. Or just drag the files to it.
In
Select outputyou can define the folder for the results.
For better results, have the audio in a lossless format (WAV or FLAC), & not MP3.
#
2. Select FLAC & GPU Conversion.
#
- At the right you can select the output format.
We recommend pickingFLAC. Learn why here.
- If your GPU is compatible with CUDA, toggle
GPU Conversionon for a faster process.
#
This step is not mandatory, but recommended for better results.
#
3. Select model.
#
- In Process Method select
VR.
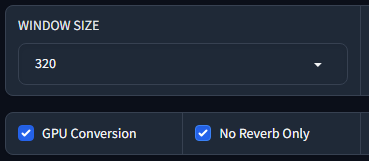
- Set Window Size to
320. (optional)
Lower Window Size yield a higher output quality, but will take longer to process.
- Check the model list. In Select VR Model pick the one according to what you need to remove.
If you need to remove multiple noises, follow this pipeline for the best results:
Remove instrumental -> Remove reverb -> Extract main vocals -> Remove noise
#
TIP: To test models/options more efficiently, tick Sample Mode to only process 30 seconds of your sample.
#
4. Process.
#
Click the Start processing button at the bottom. And that will be all.
#
If an issue arises, read the Troubleshooting chapter.
#
#
#
Troubleshooting
#
- Click the wrench (🔧) on the left & go to
Download Center - Select the category of the model (MDX-NET or VR)
- Unfold its dropdown & select the model that you need
- Then click the download button (📥). The model will download, which will take a few minutes
#
- Modify the
Aggression Settingvalue on the right. - This determines the depth of the extraction. Only the VR method has it.
- A higher value will deepen the extraction, and a lower one will soften it.
- Each audio is different, so you'll have to test the ideal value.
#
- Run the audio through MDX23C or DeNoise. Modify the Aggression Setting if necessary.
#
- Report your issue here.
#
#
#
Cloud UVR
-
-
#
How to Use
#
#
1. Set up Colab
#
- First access the Colab space here. This Colab only uses WAV audios. If yours isn't, convert it to WAV or use MVSEP.
- Then Log in to your Google account.
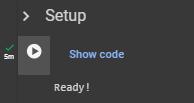
- Execute the Setup cell by pressing the play button . Grant all the permissions.

- It'll finish once the logs say "Ready!".
#
2. Set up folders
#
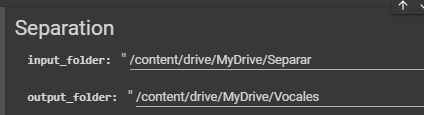
- In Google Drive, make two folders, named Separar & Vocales.
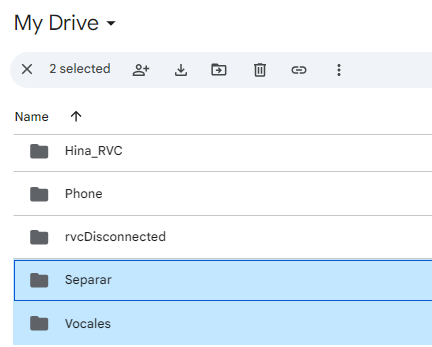
- Name them as you want, as long as the input/output folders match the paths.
#
3. Separate
#
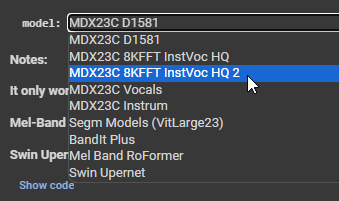
- Select the
MDX23C 8KFFT InstVoc HQ 2model & run the Separation cell.
- Download the result located in the output folder.
#
4. Clean vocals
#
- Usually songs include reverb & backing vocals. These negatively impact the results in RVC.
- So if the output has any undesired noises, follow the procedure on Cleaning Vocals.
#
#
1. Set up Colab
#
- Access the Colab space here & Log in to your Google account. Credits to Eddy for the Colab.
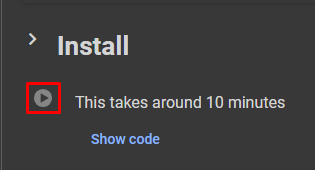
- Execute the Install cell. This will take around 5 - 10 minutes.
- It'll finish once the logs say "Installation Completed".

#
2. Run UI
#
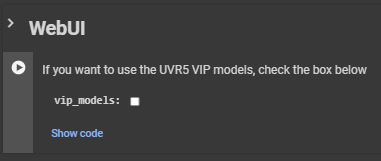
- Then below run the WebUI cell. This will take around 3 minutes.
For advanced users, tickVIP_MODELSif you wish to use them.
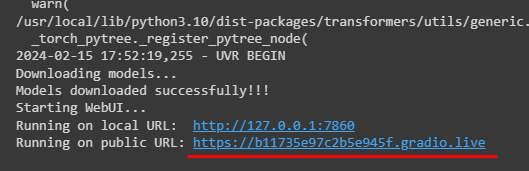
- Open the public URL. That Gradio link contains the UVR app.
#
Don't close Colab until you're done using it, and don't press buttons continuously too quickly, as it may cause errors.
#
3. Select vocals & options
#
- Tap the Input Audio box & select your audio, or simply drag & drop.
- Once it's done uploading, in CHOOSE PROCESS METHOD, select
VR Arc.

- On the left, tick
GPU Conversion& set WINDOW SIZE to320.
Lower Window Size yield a higher output quality, but will take longer to process.
#
4. Select model
#
- Check the model list & in CHOOSE VR MODEL pick the one according to what you need to remove.
If you need to remove multiple noises, follow this pipeline for the best results:
Remove instrumental -> Remove reverb -> Extract main vocals -> Remove noise
#
5. Start Processing
#
- Click Start Processing below. Wait a moment for the audio to process.
- Playable audios will then appear in the output boxes below. To download the output, click the three dots on the right and
Download.
- If you're extracting lead vocals, remember to download the backing ones if you wish to keep them.
TIP: To test models/options more efficiently, tick Sample Mode to only process 30 seconds of your sample.
If an issue arises, read the Troubleshooting chapter.
#
#
#
Troubleshooting
#
- Modify the
Aggression Settingvalue on the right. - This determines the depth of the extraction. Only the VR method has it.
- A higher value will deepen the extraction, and a lower one will soften it.
- Each audio is different, so you'll have to test the ideal value.
- Run the audio through MDX23C or DeNoise. Modify the Aggression Setting if necessary.
- This is normal. Try repeating your action.
- If it persists, reload the Gradio page.
#
- You have exhausted the GPU runtime of Colab.
#
- Report your issue here.
#

#
#
MVSEP
-
-
#
#
Important Notes
MVSEP is a website for isolating vocals, that works similarly as UVR.
The UVR Colab is much faster & convenient for this task. Use MVSEP if you run out of GPU runtime or feel lazy to convert your audio to WAV.
For free users, you can't convert audios in batches or longer than 10 minutes. If that's your case, trim it into different pieces.
#
#
#
How to Use
#
#
1. Log in.
#
Logging in is not mandatory, but recommended for shorter waiting lists.
#
2. Select audio.
#
Click
Browse File& select your audio, or simply drag & drop. The audio will begin to upload.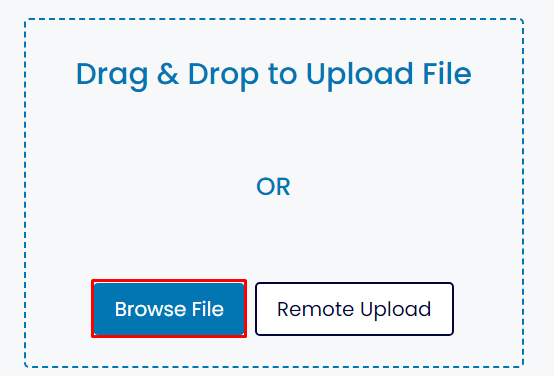
#
3. Extract vocals.
#
In Separation type select
MDX23C
In Output encoding select
FLAC.
We recommend selecting FLAC from now on. Learn more here.
Once the audio is done uploading, click
Separate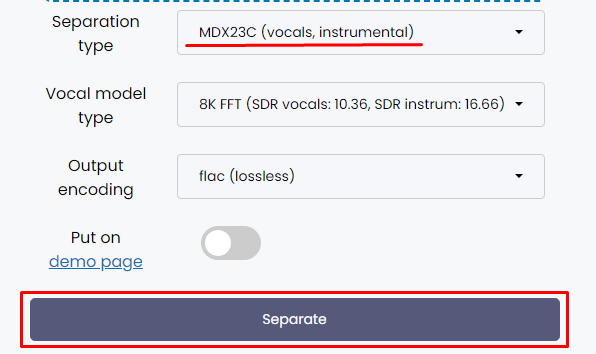
Leave "Model Type" untouched.
#
4. Download output.
#
- When it's done converting it will redirect you to a page where you can listen the results.
Tap the three buttons of the Vocals audio and then
Download.
Same thing for the Instrumental, if you wish to keep it.

#
4. Clean vocals
#
- Usually songs include reverb & backing vocals. These negatively impact the results in RVC.
- So if the output has any undesired noises, follow the procedure on Cleaning Vocals.
#
#
1. Log in.
#
Logging in is not mandatory, but recommended for shorter waiting lists.
#
2. Select audio & output format.
#
Click
Browse File& select your audio, or simply drag & drop. The audio will begin to upload.
In Output encoding select
FLAC.
We recommend selecting FLAC from now on. Learn more here.
#
3. Select model.
#
- In Separation Type, select
Ultimate Vocal Remover 5 HQ.
- Check the model list. In
Select VR Modelpick the one according to what you need to remove.
If you need to remove multiple noises, follow this pipeline for the best results:
Remove instrumental -> Remove reverb -> Extract main vocals -> Remove noise
#
4. Download output.
#
Click
Separate& when it's done converting it will redirect you to a page, where you can listen the results.
Tap the three dots of the audio you need and then
Download.
If you wish to keep the backing vocals stem, remember to download it too.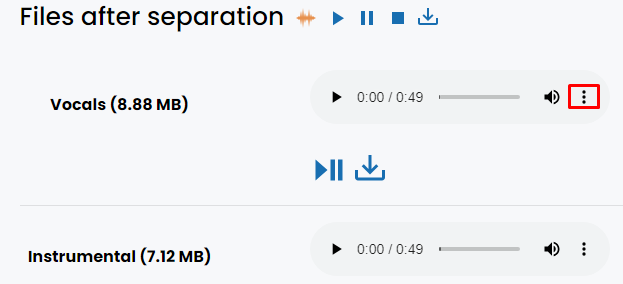
If an issue arises, read the Troubleshooting chapter.
#
#
#
Troubleshooting
#
- Using the Separation Type of
Ultimate Vocal Remover HQ, you can modify theAggressivenessvalue. This determines the depth of the extraction. - A higher value will deepen the extraction, and a lower one will soften it.
- Each audio is different, so you'll have to test the ideal value.
#
- Try running the audio through MDX23C or DeNoise. Modify the Aggression Setting if necessary.
#
- Report your issue here.